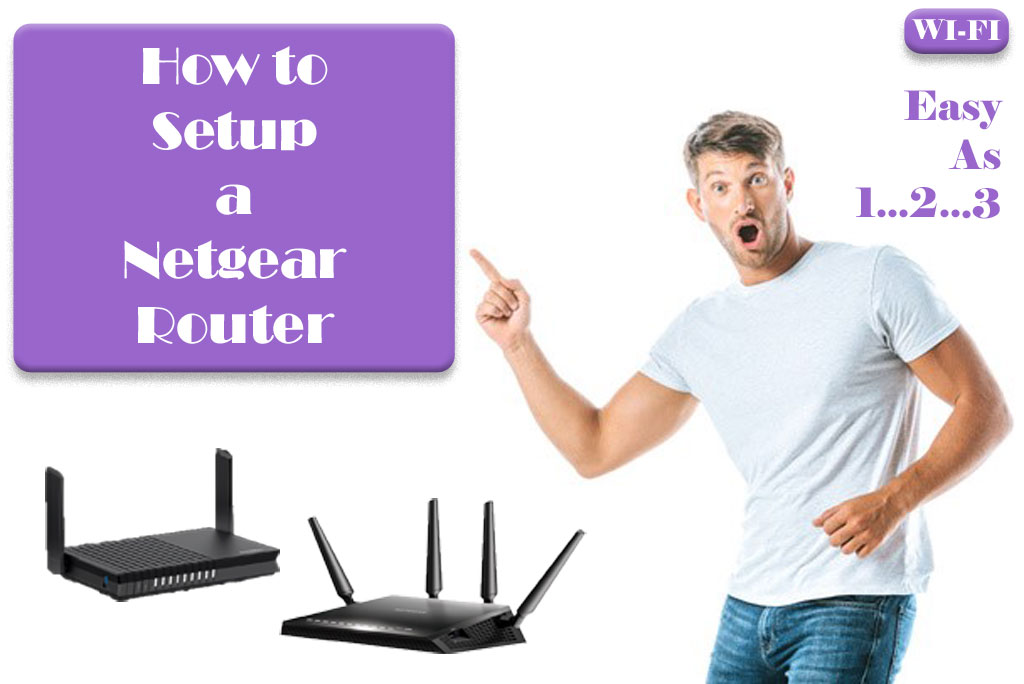
How to setup a Netgear Wi-Fi Router
According to the manufacturer the NETGEAR Wi-Fi router will give you fast & flawless internet connectivity at a great price point. Admittedly we have never been a fan of their routers – namely the QoS and DNS proxy functions of the router – but they do make a cool looking product. Gamers and StarWars fans will love their new desk space altering X-Wing/Tie Fighter design – why do they do this? Seriously… well, now you bought one… so let’s get it setup.
For the most part, the NETGEAR Wi-Fi router comes ready to be used right out of the box. It comes pre-setup for basic operation as a wireless router from the factory. You can connect to its pre-configured Wi-Fi network using the information on the bottom sticker of the router (some also come with a Wi-Fi sticker on the top of the router). Simply plug your Internet connection into the routers WAN (internet) port, and you’re off and running.
Advanced Setup Guide
If you desire something other than the baseline configuration. You can use this guide to get your Netgear Wi-Fi router setup in minutes thanks to its intuitive “Genie” web interface. It is a highly reliable and budget friendly router option for small to large sized households.
A note before beginning…
Before starting the configuration, we recommend plugging your internet connection into the routers WAN (internet) port. This port is usually yellow, but can also be blue – it will always be labeled “Internet” or “WAN”.
While it is possible to program the router for the first time using its pre-configured Wi-Fi, it adds a few steps that can complicate matters if you don’t already know what you’re doing. For the purposes of this guide we are going to recommend that you use the included Ethernet cable to plug your computer into one of the four (4) LAN ports on the back of the router. After successfully connecting your computer to the router using the provided Ethernet cable, you can follow the rest of this setup guide.

Step 1. Login to the router’s graphic user interface (GUI) using your web browser.
Open a browser window and navigate to one of the two websites: http://www.routerlogin.net/ or http://192.168.1.1 (you can also just click one of the links).
The default Username is: “admin“, and the default Password is: “password“. We recommend changing this to a secure (not easy to guess) password. Make sure you remember what this is (write it down somewhere).
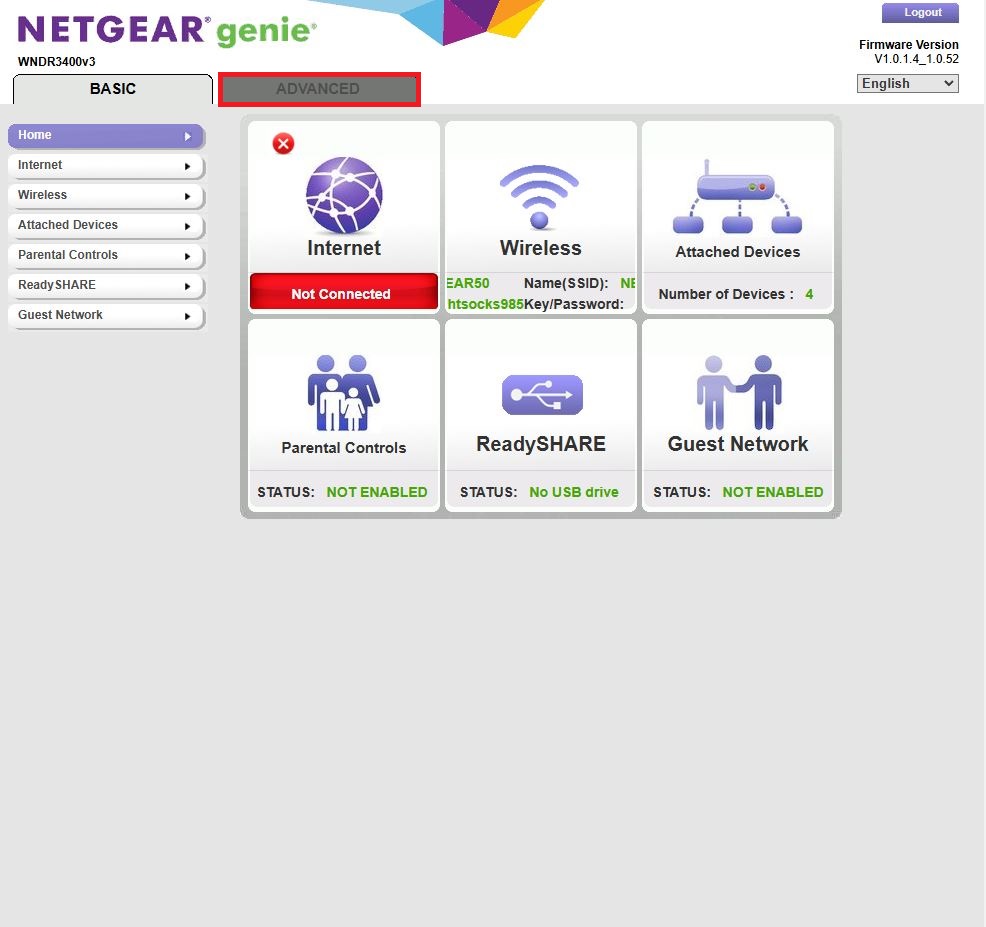
After logging into the router you will see a webpage with a menu on the left.
Step 2. Click on the Advanced shortcut at the top of the screen
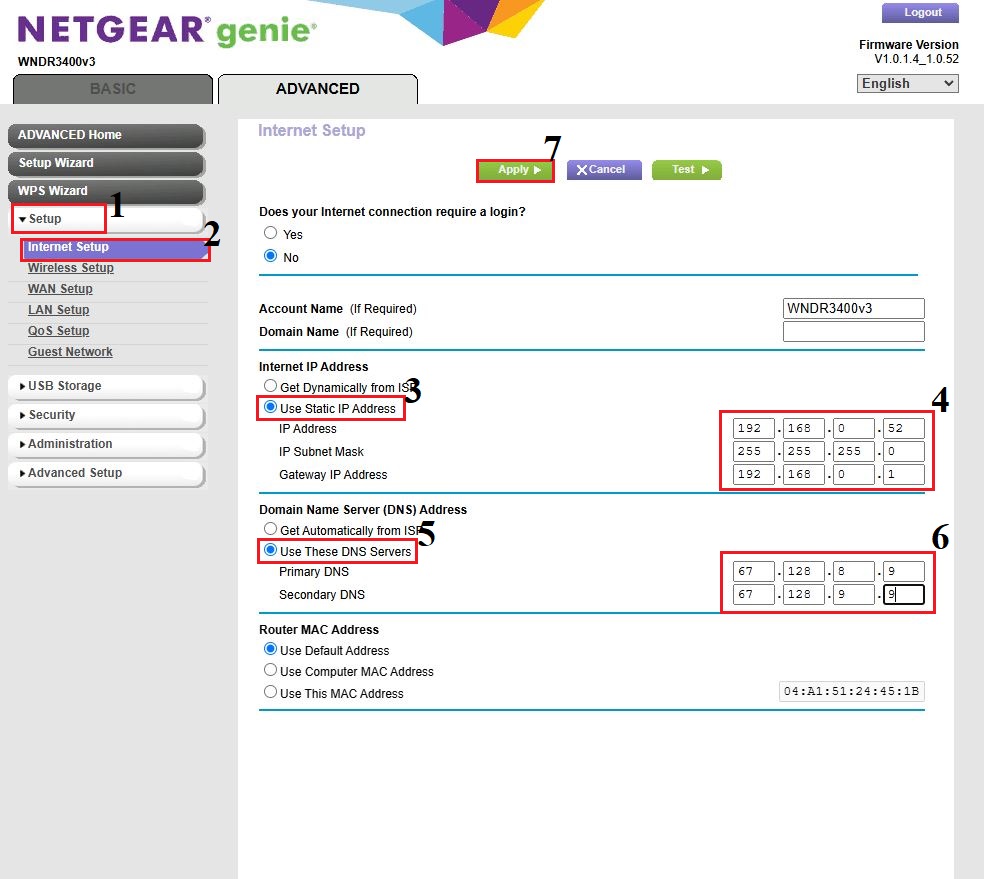
Step 3. Modify your Internet (WAN) connection settings
- Click on “Setup” on the left menu.
- Click on “Internet Setup” in the sub menu.
- Click on “Use Static IP Address”.
- Fill in the IP address of “192.168.0.52”, Subnet Mask of “255.255.255.0”, and Gateway IP Address of “192.168.0.1”.
- Click on “Use these DNS Servers”.
- Fill in the DNS Servers of “67.128.8.9” and “67.128.9.9”.
- Click on “Apply” at the top.
Wait for the settings to take effect.
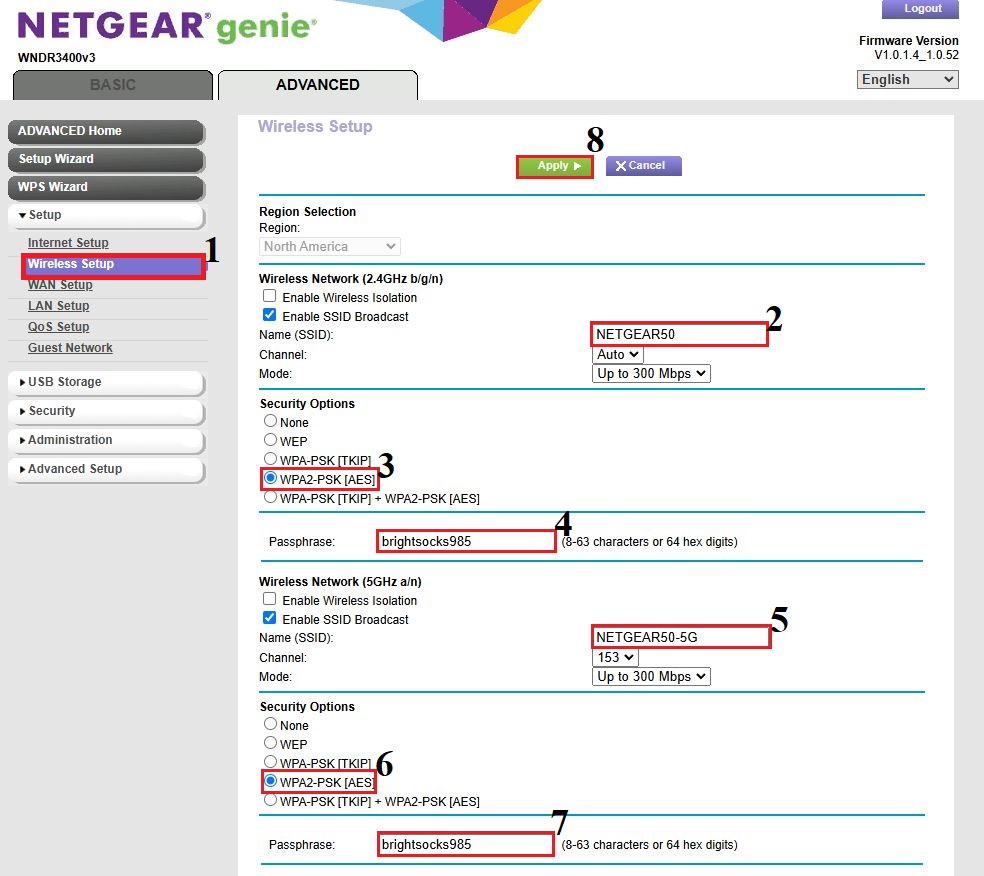
Step 4. Program the Wi-Fi connection settings
You can leave this section set to the default Wi-Fi information if you wish. Just skip to the next step.
- Click on “Wireless Setup” in the left menu
- Change the SSID to one you want – Netgear users are particularly fond of “FBI SURVEILLANCE VAN”
- Select WPA2-PSK (AES) as the encryption.
- Modify the default password to something equally as creative.. but secure.
- Change the SSID to the same as from step 2, but include “_5G” behind it (5GHz).
- Select WPA2-PSK (AES) as the encryption type here again.
- Use the same password from step 4 here.
- Click on “Apply”.
Wait for the settings to take effect.
Step 5. Create a DMZ for the network
- Click on “WAN Setup” on the left menu.
- Enable “Default DMZ Server”
- Enter in “192.168.1.52” in the available field.
- Make sure “NAT Filtering” is set to “Secured”
- Click on “Apply”.
Wait for the settings to take effect.
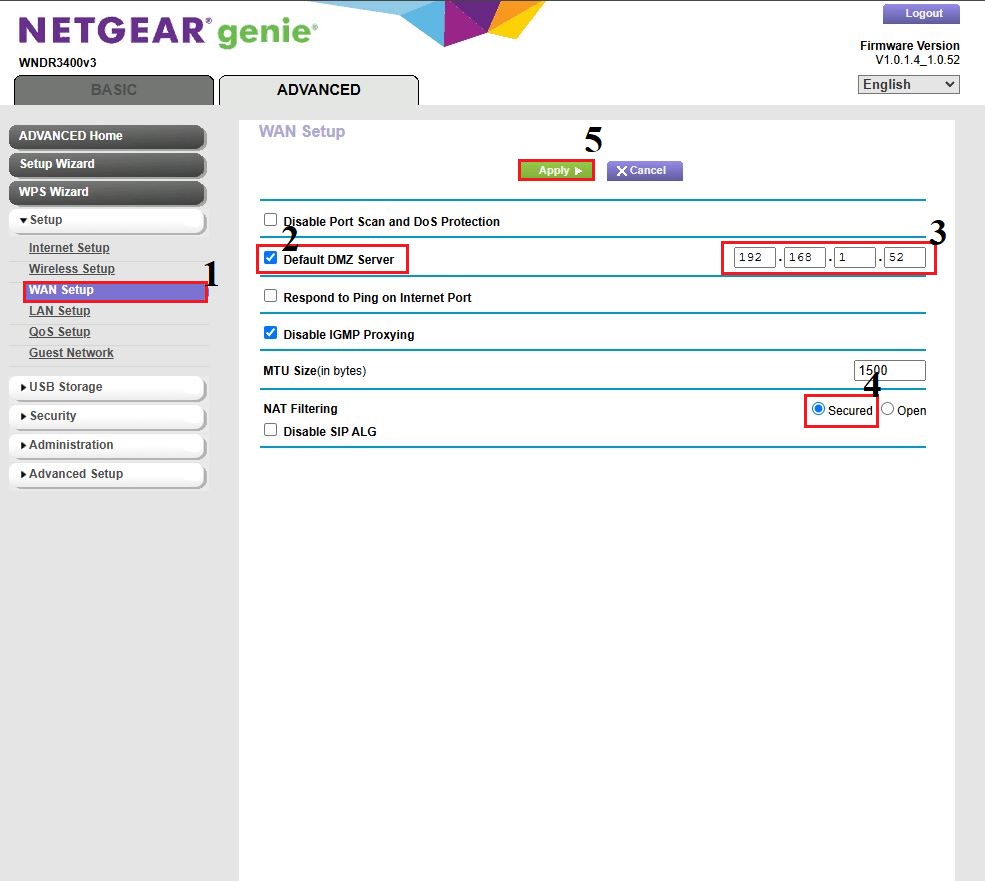
If you have an XBOX or gaming console that is protesting your NAT Type select “Open” NAT Filtering instead.

Step 6. Configure any Port Forwarding
- Click on “Advanced Setup” on the left menu.
- Click on “Port Forwarding / Port Triggering” in the sub menu.
- Make sure the “Port Forwarding” radio button is selected.
- Click on “Add Custom Service” button
- Enter any relevant information for the new service.
- Select the custom service from the menu, and put in the IP address of the device you are forwarding to.
- Click on “Add”.
- Now click on “Apply”
Wait for the settings to take effect.

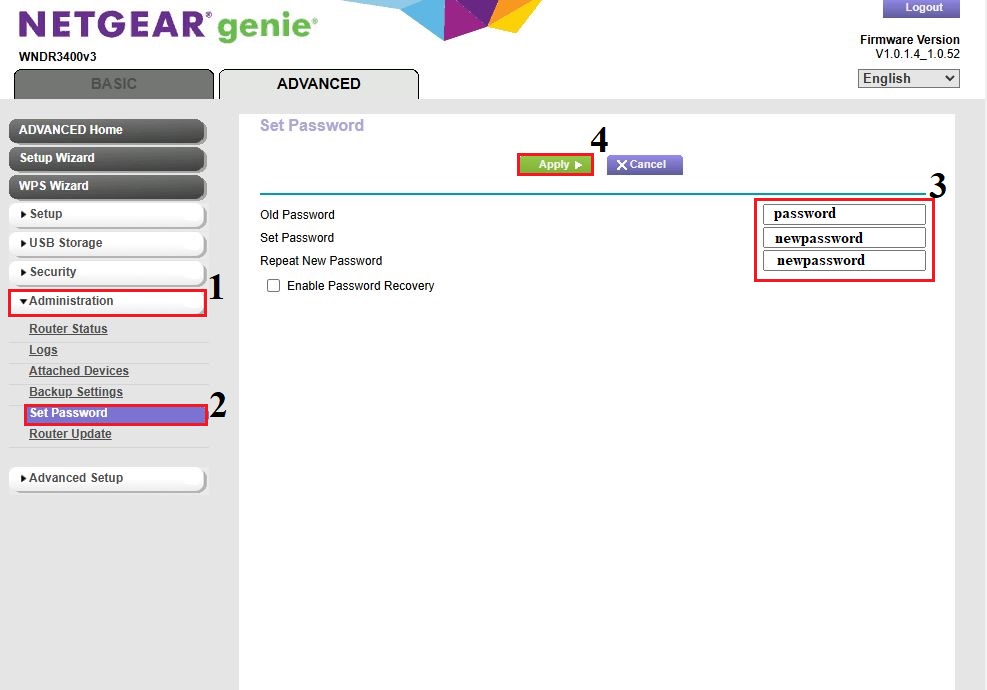
Step 7. Change your Router Password
- Click on “Administration” on the left menu.
- Click on “Set Password” in the sub menu.
- Enter your old password. Enter your new password and confirm.
- Now click on “Apply”
Wait for the settings to take effect.
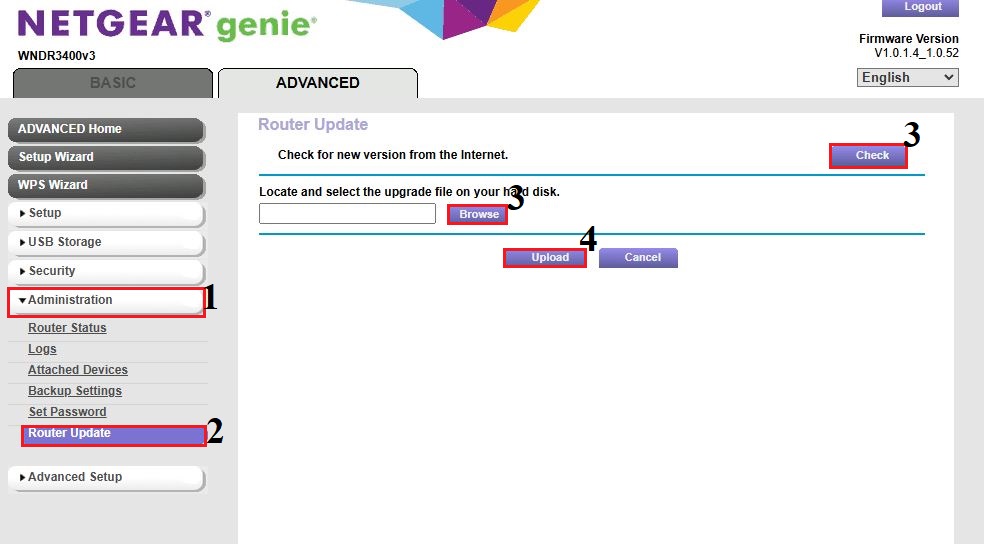
Step 8. Update your Routers Firmware
- Click on “Administration” on the left menu.
- Click on “Router Update” in the sub menu.
- Click on “Check” next to “Check for new version from the Internet”. Alternatively, you can go to the NETGEAR website and download the firmware for your specific model. Click “Browse”, and select the file.
- Click “Upload”.
Wait for the firmware to be installed, and router to reboot. This may take up to 5 minutes. Do not unplug the router during this time.
That’s it – you successfully programmed a B-52 stealth bomber… errr NETGEAR router.
Hit a roadblock or didn’t understand a step? Give our technical support a call, they’ll gladly help you get it right.
(520) 421-3333 opt. 2.