How to update the firmware on a NVR or DVR
Looking to update the firmware on your LTS Security or Hikvision Digital Video Recorder or Network Video Recorder? Look no further than this comprehensive guide, complete with step-by-step instructions and helpful screenshots. Follow along as we walk you through finding your recorder’s model number, downloading the firmware from the LTS Security or Hikvision website, extracting the files, and uploading the firmware to your NVR or DVR. Our easy-to-follow guide will have your recorder updated in no time, ensuring you have the latest features and security updates available.
This Guide is applicable only to the LTS Security / Hikvision Digital Video Recorder (DVR) and Network Video Recorder (NVR).
This guide includes instructions for using and managing the product. Pictures, charts, images and all other information hereinafter are for description and explanation only.
The information contained in the Manual is subject to change, without notice, due to firmware updates or other reasons.
For LTS Recorders, please find the latest version using the LTS Security company website.
For Hikvision Recorders, please find the latest version using the Hikvision company website.
Please use this user manual under the guidance of CGI or LTS security professionals.
Firmware is specific to your Recorder’s Device Model Number!
The model number for your LTS / Hikvision recorder is on the bottom sticker of the unit, however we have found that it is sometimes easier to pull the model number from the GUI or web interface. Since we will be updating the firmware using the web interface, we will focus on showing you that method in this guide.
Quick Access for LTS NVR or DVR Firmware: Download
Quick Access for Hikvision NVR or DVR Firmware: Download
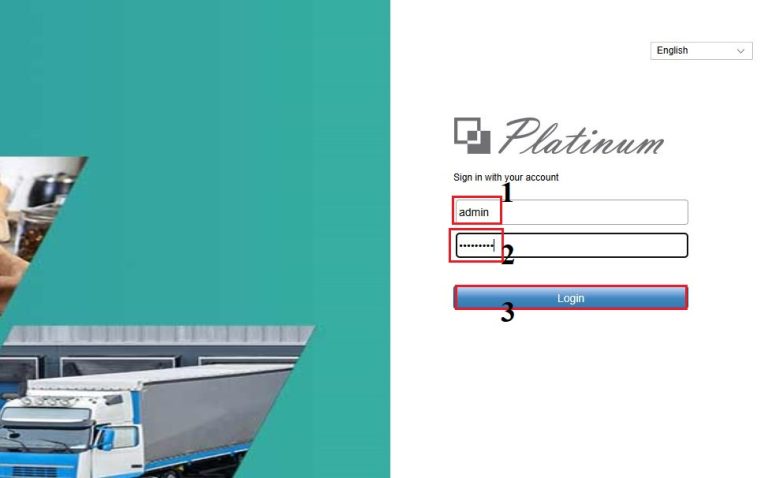
Step 1: Login to the recorder from a computer connected to the same network as the NVR or DVR.
Open a web browser and go to the IP address or your recorder – we would provide this to you at time of installation e.g. https://192.168.1.52.
Please note – we are using an LTS recorder as an example, the process is almost exactly the same for Hikvision recorders.
- Enter your “Username”
- Enter your “Password”
- Click “Login”.
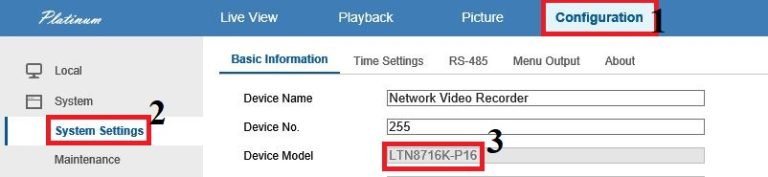
Step 2: Find the Device Model Number of your NVR / DVR, and Download the Firmware from LTS / Hikvision
From the Website GUI:
- Click on “Configuration” in the top menu.
- Click on “System Settings” in the left menu.
- Find the model number (you can highlight it, then right click, and copy it for convenience).
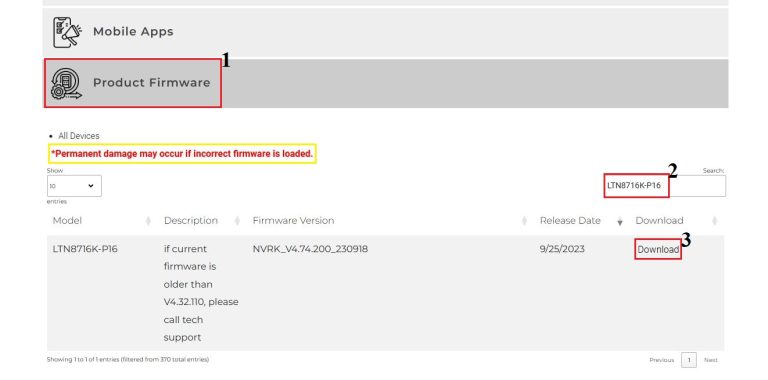
Now go to the LTS Security or Hikvision Website and Download the Firmware for your Recorder.
Click here to download the Firmware for your LTS NVR or DVR: Firmware Download
Click here to download the Firmware for your Hikvision NVR or DVR: Firmware Download
- Click on “Product Firmware” in the top menu.
- Enter or paste your device model number in the search field and hit enter on your keyboard.
- Click on “Download”.
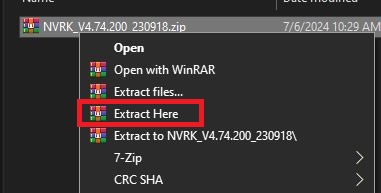
Step 3: Extract the Firmware from the .ZIP archive
Now go to the location on your computer where you downloaded the file and saved it. Usually this will be the “Downloads” folder.
Once you have found the file, right click it and select “Extract Here”.
Step 4: Upload the Firmware to the NVR or DVR
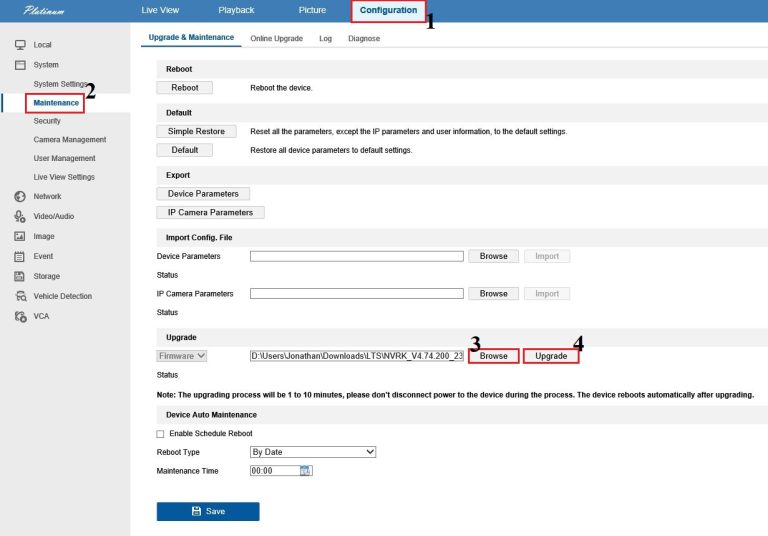
Go back to the open NVR or DVR webpage from before and upload the firmware to the recorder.
- Click on “Configuration” in the top menu.
- Click on “Maintenance” in the left menu.
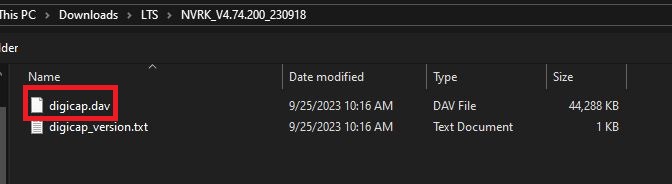
- Click on “Browse”, navigate to where you extracted the “digicap.dav” file, and select it.
- Click on “Upgrade”.
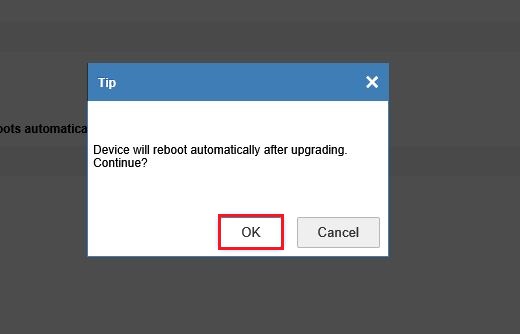
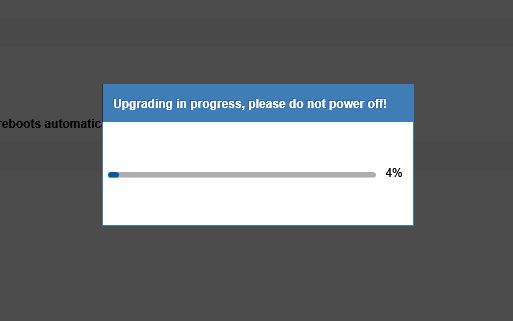
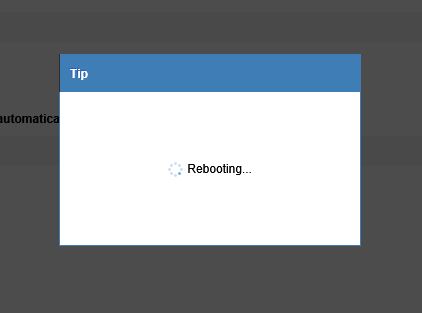
Step 5: The NVR or DVR will Update Automatically
From here you will see several screens progress. Once the recorder has updated the firmware, and rebooted itself. You will be presented with the login screen again. Once you see this screen you are done!
If you had problems or couldn’t find the firmware on the LTS Security or Hikvision website for your model number, please give our Tech Support a call, we will be happy to assist you.
(520) 421-3333 opt 2.